Posted on

Zenith Dress – Little Kiwi’s Closet

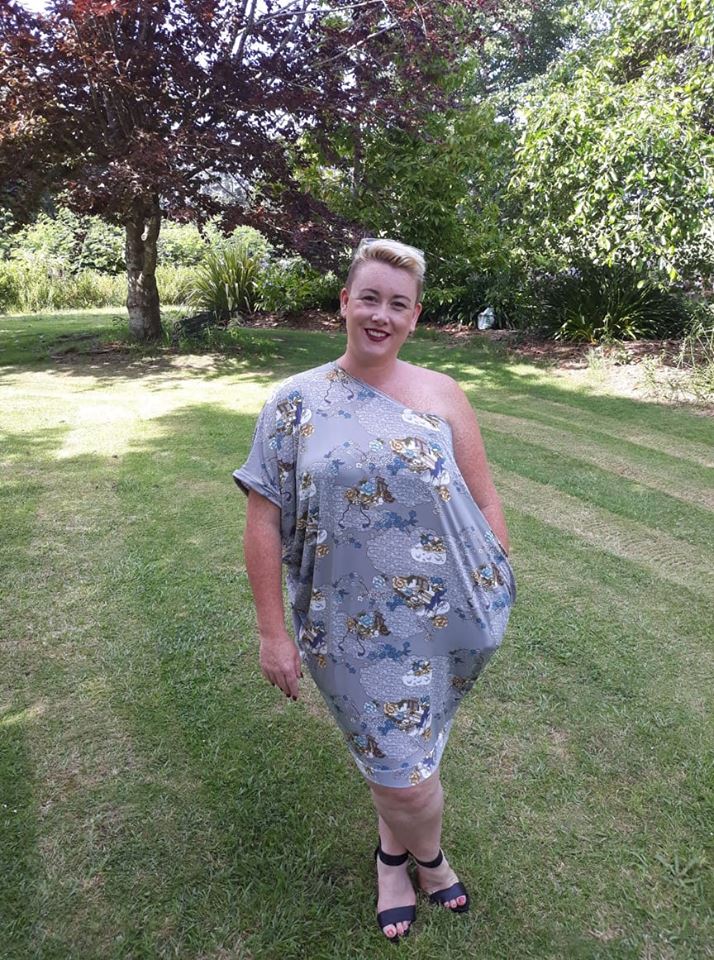
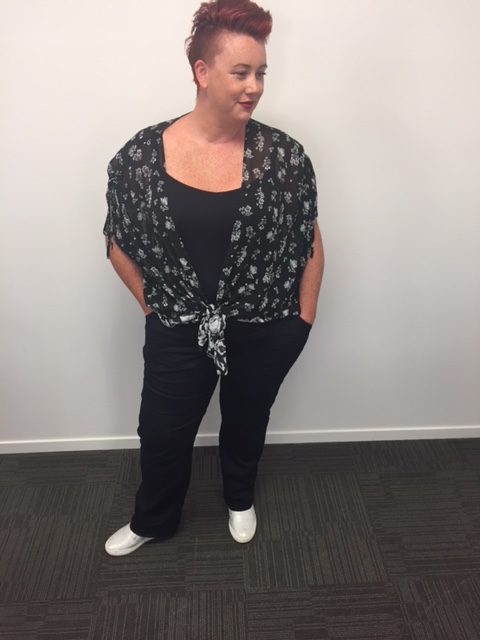
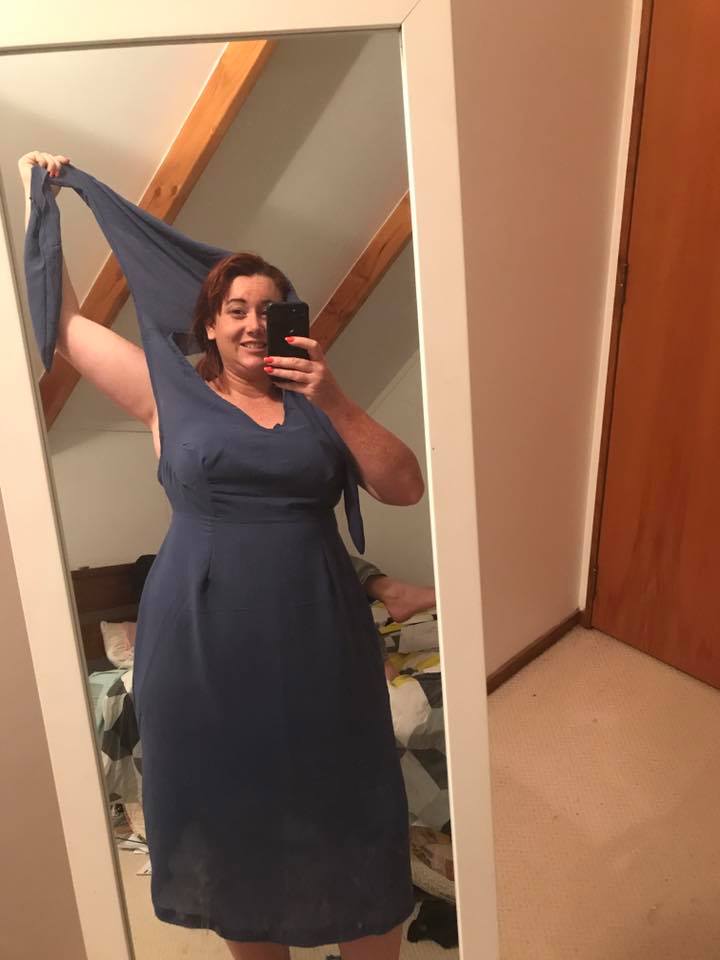
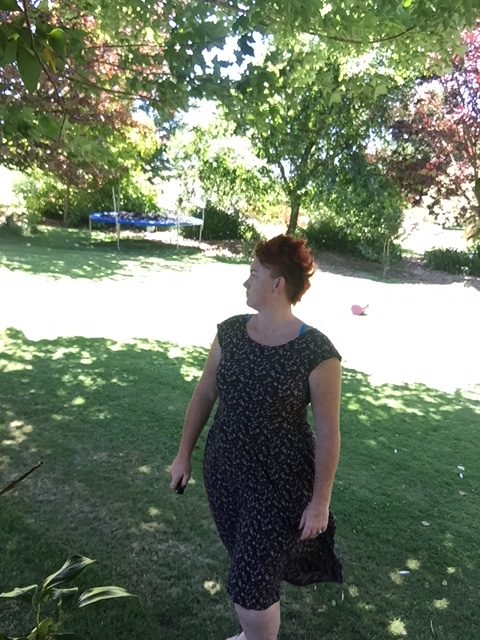
I was lucky enough to test the Zenith Dress for Little Kiwi’s Closet. I was a bit wary of the shape of this on my body but I actually really love it. It’s so comfortable and flowy for this hot weather! Here I am wearing tights, but my office is sooooo airconditioned that I actually need to take a jersey to work even though it’s 30 degrees out.

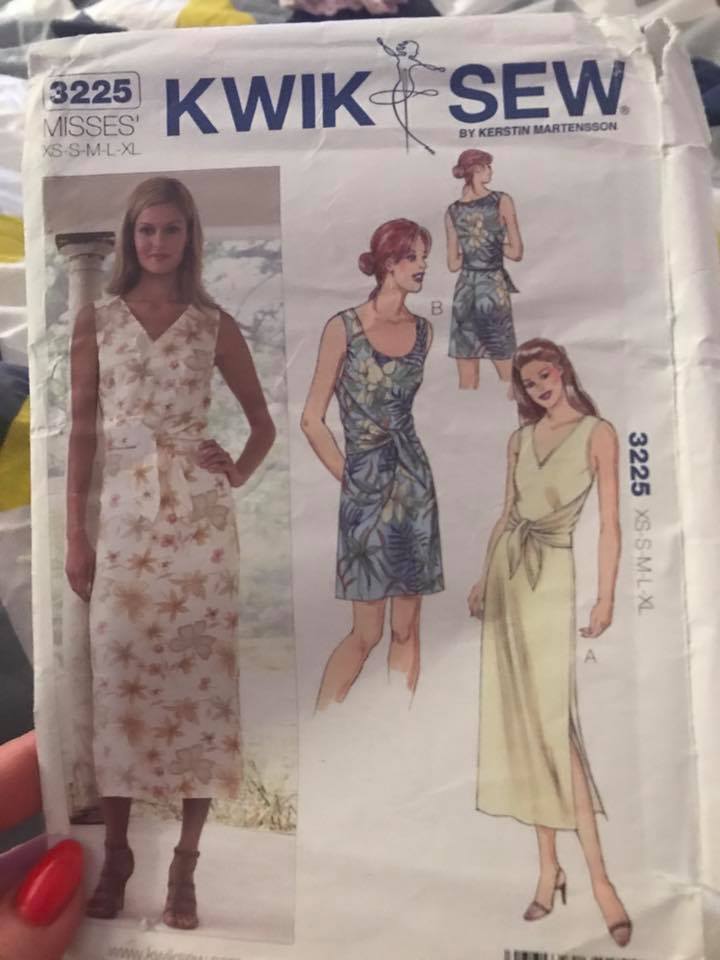
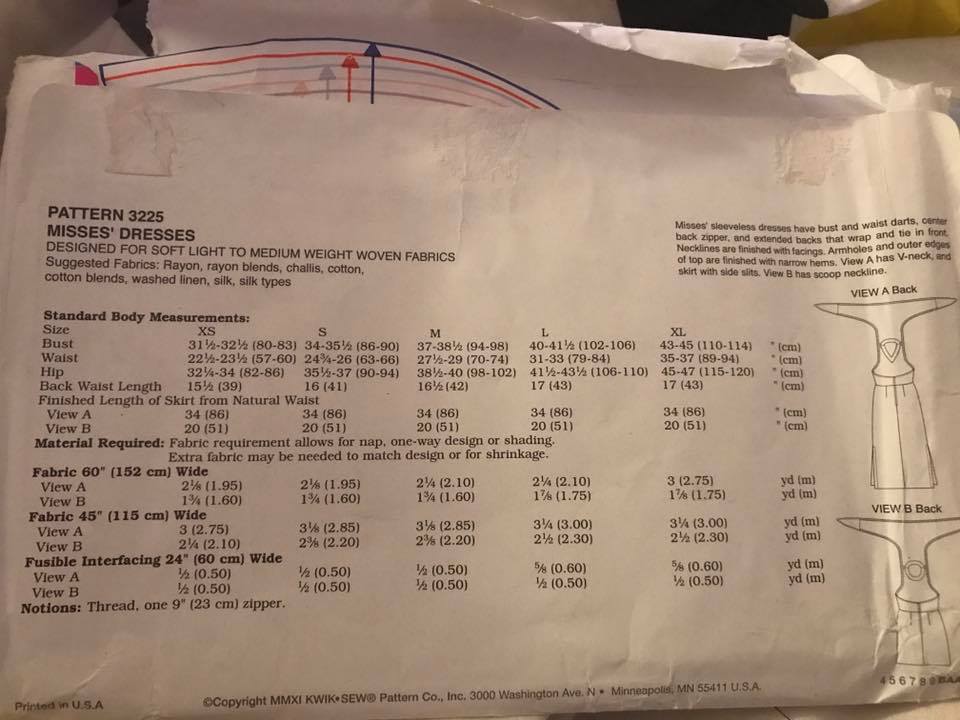
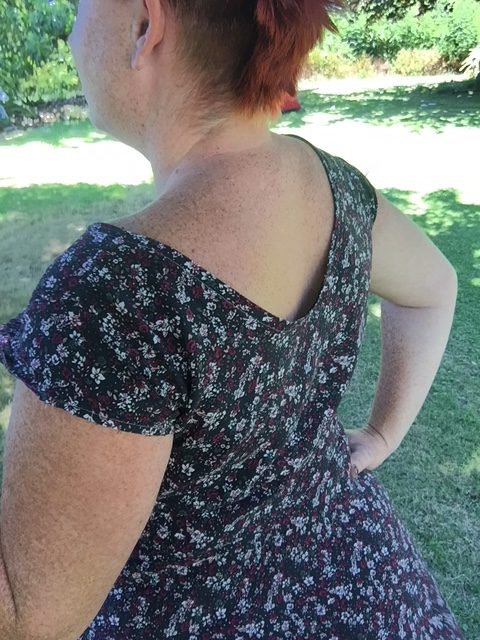
There are a few options for this dress – there is a V neck or Scoop neck, pockets and option to modify the length.

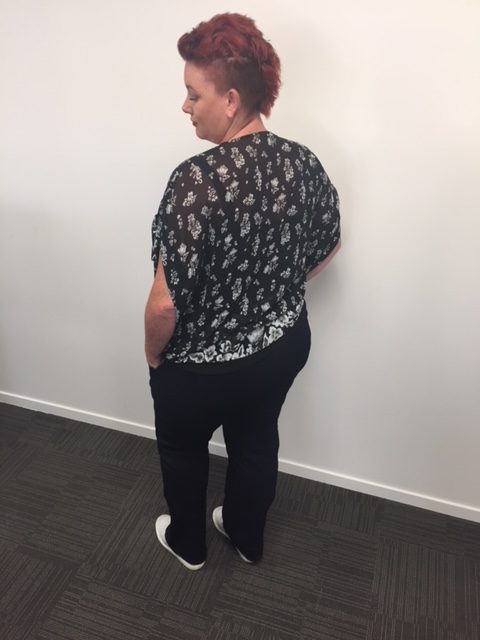
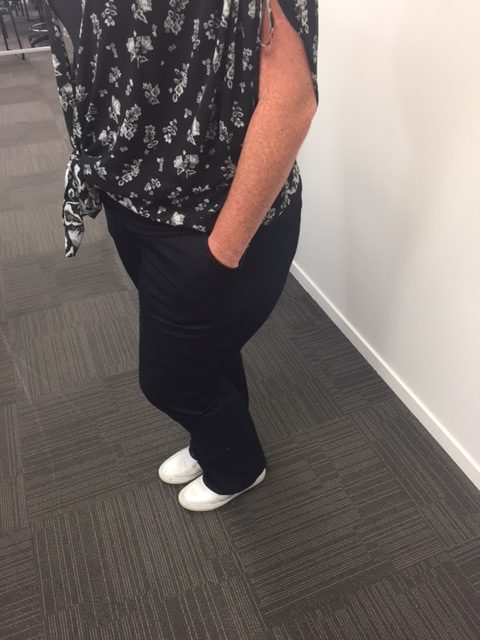
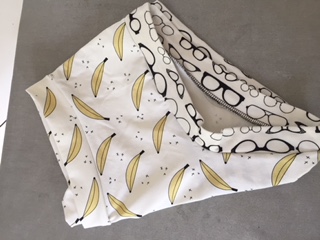
I will say that this material was an absolute bitch to sew. You can’t really see it in the photos but the v neck is off centre even though I pinned it to within an inch of it’s life!

This is the type of dress that if you are like me and try to do things as fast as possible, you’ll love it. Everything has bands except the hem (hint – I cheated and did a band there too!). I also had a ‘helper’ for this one. My youngest likes to drive the pedals……. not ideal with an overlocker so there may or may not be a few flaws. That’s cool though – all good experience and hopefully they will both get the hang of sewing – maybe they can be fashion designers….. think of the material (drool).

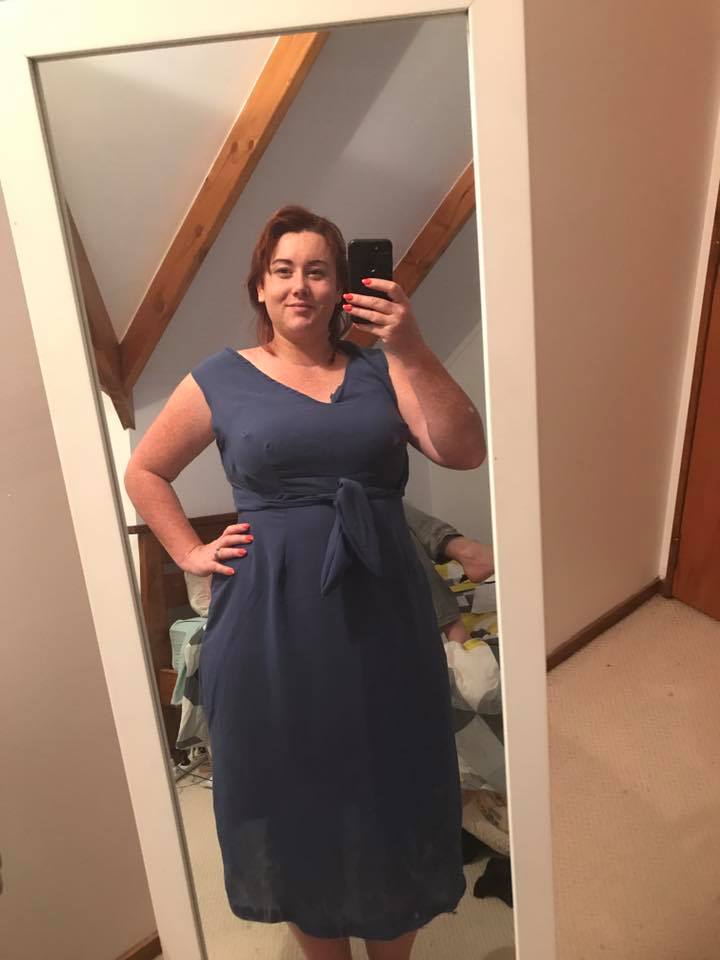
There are so many ways to wear this dress too. Below is 2, but there are heaps – you can turn it upside down and have a cowl at the top. I chose to try it as a romper – perhaps a bit breezy on my nether regions and my husband was concerned that it might be inappropriate.

Construction: easy as accidentally drinking a bottle of wine

Modifications: none – next time I would maybe size down the top and lengthen as I don’t like my knees showing.

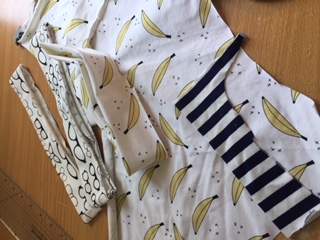
Material: ermmm horrible! I don’t actually know. It’s very stretchy and very drapey, like a spandex and rayon maybe.

Posted on 2 Comments

Port City Pants – Sew to Grow

Safe to say that Port City Pants have changed my life. I can now make pants in whatever style I want (within reason of course) by using these as a block. For those who don’t know what I mean, I use the base pattern that I have tailored to my body and can adjust the height, length and leg width.

This was another pattern that I worked on at the Fit to Flatter workshop and was VERY skeptical that I could get a pair of pants to fit me/ suit me. Unfortunately I didn’t take any photos of the draft which would be good to see the modifications, so I’ll try drawing it. Below you can see that I needed to grade pretty hard core between sizes. I then sewed a muslin and discovered that it was far too big and I needed to go back down to a 2XL and do a full bum adjustment to lengthen the crotch basically. Once that was sorted, it went together surprisingly well.

Final construction – I decided to do my first pair in suiting with the intention of making a blazer and pants for work. This was a looser fit more like in the advertised photos. I don’t have any good photos of me in those ones sorry but when I go back through my memade wardrobe I will update some of the blogs.

The second pair I decided that I wanted to tackle more like pull on jeans. I downsized and used stretch denim in black and added knit pockets to give a little more ease to get them on. I prewashed this fabric a couple of times as I’ve had it shrink on me in the past (unfortunately it has still shrunk up a little).

Here are some finished photos – There will be more in the pipeline

Sizing: XL-2XL

Material: Stretch demin (this is about 30% stretch)

Wine pairing: A cheeky Pinot Noir suits these pants. smooth with a hint of funky

Posted on 1 Comment

Kwik Sew 3225

So I picked this one up and i’ll admit, I didn’t get that it was an over the head construction. I liked the look of the wrap as explained down below and I wondered if it would suit my curvy bod.

This time i’m reviewing the Kwik Sew 3225. Side note – why do Kwik Sew not name their clothing? #morethananumber #likemyweight

looks pretty 90’s

I found this pattern at a second hand shop. The inspiration for this was the Kielo Wrap Dress – you can kind of see the similarities right….. but being the frugal sewer I am, I didn’t want to buy another pattern that may or may not suit me so let’s call this a gateway pattern.

So, off the bat, the instructions are weird – see:

To be fair, they do make sense but it isn’t something I would naturally have tried to do. It’s really quite genius. This was a super simple sew – I made this in the semi dark while the children were asleep in the bed next to me (they like to fall asleep watching documentaries with us, judge me later). They are well used to sleeping through the sewing machine, I trained them well.

Sizing: I made the XL – I don’t think I added any extra space for the bootay, this was a trial to see what it would look like so it’s pretty rough and ready.

Fabric: I used a linen blend (an op shop special I believe). It was a bit slippy to sew and the facings gave me a bit of grief, but because this was a test sew I wasn’t too concerned.

ummmmmmm

Construction: so you can see here that I was a bit perplexed with this. I will say that it was definitely a very quick sew and easy to put together. The wrap bits need a bit of thinking about for the right way round but I found that a few glasses of wine on board made this a lot easier.

Here’s some more bad lighting photos – maybe tonight I’ll update with styled photos.

ready to wrap baby
did it!

Now lets talk modifications : This was before my eye opening experience of automatically doing a FBA. This definitely needs it – you can see the wrinkles around my boobs. By doing a FBA it will give me more room in the breasticle area and better fitting under the arm holes. The bodice could do with maybe an extra cm in my opinion. The skirt is actually pretty good aside from needing a good press. The facings were straight foward but next time I would probably do some hand sewing or iron on interfacing to keep it down better. I’m a fan of this length, I do not like to have my knees showing. I would style this with heels and bracelets rather than necklace.

Final Thoughts – this was another archive one that at the time I wasn’t totally sold on, so I didn’t do a ‘real’ one. Looking at the photos now, I actually really like this and am going to give it another go. I think it would really suit something floaty and drapy like rayon (can you tell that’s my fav at the moment) or silk. I personally don’t think that cotton would have the same look even though the pattern does mention it. The biggest question is if it looks like the Kielo….. ermmmmm, no. Aside from the fact they are completely different constructions and the body shape is drastically different, I’m not too sure what I was thinking.

Overall I’m super pleased with this dress and I have loads more in the pipe. Watch this space.

Wine Pairing: This was a Chardonnay night – I’m not going to link my favs – that’s just free advertising and they certainly don’t need it with me around!

Posted on 2 Comments

Cashmerette – Lennox Shirtdress

Last year I went through a phase of really wanting a shirt that fits my curves. I’ve had the Lennox pattern for a while but hadn’t the confidence to tackle both the button plackets and collar. I’m more of a ‘the faster the better’ sewer and by no means a perfectionist. So, with some trepidation, I entered into the Lennox dress.

Boy howdy am I pleased I did it. The inspiration for this dress actually came from a work mate who had the most amazing shirt with dinosaur fabric. I was determined to make one for myself. I found the fabric at spotlight and decided to go all out into a dress!

I will preface this before the photos to say that I actually slimmed this down a bit at the sides because of fabric challenges so it’s not as full as the image online and doesn’t have the pockets.

mirror selfie (didn’t have the selfie stick yet!)

Oh look here i am with longer blonde hair – you’ll see a lot of changes.

So this was a ‘wearable muslin’ but overall I was super happy with the fit! I didn’t have to do a full bust adjustment because Jenny actually tailors her patterns with different full cup sizes.

Sizing – 14 E/F (I could probably go down to a 12 and do the G/H to get more of a full bust in the torso but i’m happy with this). Graded out to a 16 through the hips

Modifications – this dress doesn’t need much – I did my typical Sway Back Adjustment which is basically taking a wedge out of the back – slightly more complicated with panels like this has, but not difficult at all.

See that nice SWA – noice!

Missing a panel at the side

Fabric – recommended fabric is lightweight woven. I would not venture into even trying a knit with this design – I just don’t think it would work well. I think this would look stunning in rayon for the drape. I will try that next time. This fabric is poplin.

Final thoughts – I love this dress. I was scared for no reason whatsoever about the collar – though I am very visual so I did need to watch a youtube video of how to do it because I seem to be totally incapable of reading instructions! It worked alright so my next one will definitely be better. Overall the fit was great, went together really well and fast. This dress probably took me 3 hours after cutting it out.

I wore this to work happily (flaws and all) to show off to my workmates – they were suitable impressed.

xo

Posted on

The struggle of a good pair of undies

Oh MAN i’m sick of buying undies! This is one of those things that you don’t even think about being a problem, but if you’ve got a booty, it really is. Let me explain – undies are made generally the same size front and back, with sometimes a little bit more coverage at the back, but seriously NO. See look. That isn’t covering anything! When I wear these – the front is fine but the back only goes about half way up my butt.

In search of the perfect pair of undies I set out to make my own. I looked on the Curvy Sewing Collective round up of undies and some blogs about the best fit. There is also a free undie pattern by Melly Sews which I haven’t yet tried because I bought this pattern quite a while ago and really didn’t want to keep buying patterns (you’re welcome Sam!)

Ok, so firstly I made a straight XL which has Full Hip – 44″ – 46″ and low waist 41″-43″. I’m actually not too sure what made me do this. These are NOT my measurements. My measurements are Full Hip – 48.5″ and low waist 41″. So I should have mashed sizes…….I didn’t.

Here it is – all cut out – in the wrong size
all cut out, aren’t they cute
Finished!

So let’s recap – I made some undies in super cute fabric. This was a trial because you should ALWAYS do a draft in material you don’t care overly much about.

Material – Cotton Lycra with 40% stretch, lining – DBP (Double Brushed Poly) cause it’s super soft – not too sure that it’s the best for lady parts with breathability. I’ll def use cotton for my next pairs.

Sizing – yeah, it was realistically just a bit too small even with the stretch. I will size up at least one size for the full hip but keep the low waist

Fit – I made a boy leg which sits wrong on my body – I would recommend making a brief for those woman who have fuller bums so the leg holes don’t roll up (does that make sense?)

Modifications – I think i’m going to have to do some kind of Full Bum Adjustment – here is a link to some adjustments – looking at this, I will add probably an inch to the bum. Another mod you could make if you were that way inclined it to do a built in pad. This doesn’t have a fully enclosed gusset so you could slide in a panty liner or actually just sew in some padding for light bladder leakage or period panties. I’m not going to try this as I’ve had a hysterectomy so thankfully don’t have to deal with mother natures ‘gift’ every month – if you do it, let me know how it goes.

Wine pairing – Yeah this was more than a wine – this is definitely Vodka & Tonic. For such a small garment, it definitely poses many confronting questions about lumps and bumps (yeah yeah, i’m cool with them, but fitting them is sometimes a different story!)

So there you go – hopefully this helps someone

xoxo

Posted on

The clicky thing

Hey guys – I bought a selfie stick! Well, it’s a bluetooth clicky thing so I can get pictures of my makes – dedication right!! You can see it featured in this terrible photo…… so far it has actually held more use for a hand held device for the kids to watch cartoons.

Here is the link to a bluetooth selfie stick – this isn’t the one I got, I can’t find the one I got – it was from a random phone accessory store. You can tape them to a tree like I do, or get one with a tripod (that would have been smarter). Here is a link

Posted on

Sweet Summertime Peplum – Sew to Grow

A while ago I was fortunate enough to go to on a sewing retreat with Sew to Grow’s Lindsey Rae…. I was most excited about 4 days away from my young children with a sewing machine, like minded women and wine (of course). This was a first for me – going away and learning how to tailor clothes to fit my body. I had an amazing time connecting with a fellow introvert (love your work babe) and forging connections outside my comfort zone.

Full disclosure – I am definitely not an ‘average’ shape with a generous booty and big boobs. I’m quite happy with this, but it seems that Ready to Wear (RTW) clothes only have one shape and just get bigger. Shopping expeditions felt horrible and I felt soooo defeated after every one. Forget about buying jeans!

Going on this course was so liberting – there was no apologies about where my lady lumps are, only the way to adjust clothes to accentuate or fit properly. You may see a few more of the makes from this trip coming up. I also did the Freemantle Frock, Bespoke Blazer and Port City Pants all by Sew to Grow – pretty much wardrobe staples. Now all I need is a fail safe pencil skirt for a mum tum and a nice tank and I’m set.

I chose the Sweet Summertime Peplum dress – which, to be fair, doesn’t have much of a peplum unless it’s in a sticky outy material and top, but I still love it. The pattern is relatively simple to put together and only takes a wee while to sew up. The details are in the altering. In my case I needed a Full Bust Adjustment (FBA) and a Sway Back Adjustment (SWA) – Link here if you think you may need one. Personally I never realised that it would change my life so much, I just thought I was destined to have a big booty and pooling material above it for life.

No pooling!!

See there – no pooling!

This material is rayon and I love the drape of it – but you can use any lightweight material. This pattern is not for knit, but you could potentially make one with a bit of give so that you don’t have to put an invisible zip in. I find that I don’t need a zip in most dresses because by boobs are big enough that it goes over fine with a FBA and saves messing with a zip 🙂

This is a new staple in my wardrobe and I’ve already made 4 with a few more in the wings!

My measurements are:
Bust – 108cm
Waist – 90cm
Full Hip – 125cm (yup, I’m a little bottom heavy lol)

Wine Pairing – Ohhhhh I think I nice Sav would go well with this one. I didn’t drink making this one as I was around other people who I didn’t think the level of swearing would be appropriate..)